Introduction to DIY Tiling
Diving into the world of do-it-yourself projects can be an exciting endeavor, especially when it comes to tiling. The transformation that new tiles can bring to a room is often astounding, but the process can also be fraught with potential pitfalls if not executed correctly.
A Brief on DIY Tiling
DIY tiling involves the process of installing tiles yourself, without the aid of a professional. This can include tasks such as preparing the surface, choosing the right tiles, applying adhesive, laying the tiles, and grouting. While it may seem daunting, with the right knowledge and practice, it’s an achievable task for many homeowners.
Tiling can be applied to various areas in the home, such as the kitchen, bathroom, or even outdoor spaces. The type of tile used can vary greatly depending on the area being tiled, with options ranging from ceramic, porcelain, glass, stone, and more. For more information on choosing the right tile, consider our guide on choosing the right tile for your kitchen.
Importance of Proper Tiling
The importance of proper tiling cannot be overstated. When done correctly, tiling can improve the aesthetics, durability, and value of your home. It provides a waterproof barrier in wet areas, protects surfaces from wear and tear, and can even improve the energy efficiency of your home by providing additional insulation.
However, improper tiling can lead to numerous issues such as uneven surfaces, loose tiles, water damage, and more. This is why it’s crucial to avoid common DIY tiling mistakes and to understand the importance of proper technique.
In the following sections, we will delve into common tiling mistakes and how to avoid them, ensuring that your DIY tiling project is successful. Whether you’re embarking on a small bathroom refresh or a complete kitchen renovation, these tips will guide you toward a beautiful and long-lasting tiling installation.
Remember, the goal of DIY tiling is not just about saving costs, but also about learning a new skill, exploring your creativity, and taking pride in the accomplishment of enhancing your living space with your own two hands. By understanding the ins and outs of tiling, you can avoid common pitfalls and achieve a professional-looking finish on your DIY tiling project.
Common DIY Tiling Mistakes
A common thread among DIY enthusiasts is the presence of trial and error throughout the learning process. However, when it comes to tiling, mistakes can be costly and time-consuming. Let’s explore some common slip-ups in the realm of DIY tiling and how to sidestep them.
Not Preparing the Surface Correctly
One of the foremost DIY tiling mistakes is neglecting to properly prepare the surface. The surface upon which tiles are to be installed should be clean, flat, and dry. Any dust, debris, or uneven areas can prevent the adhesive from bonding correctly, leading to loose tiles and an unprofessional finish.
A simple solution involves thoroughly cleaning the surface and repairing any cracks or uneven spots before starting the tiling process. For more detailed insights, refer to our article on tiling.
Using the Wrong Adhesive
The choice of adhesive plays a pivotal role in the success of a tiling project. Using an adhesive that’s not suitable for the type of tile or the surface can result in tiles that do not stick properly or start to come loose over time.
Before starting the project, it’s important to read the manufacturer’s instructions and ensure that the adhesive is compatible with the type of tile and surface. For more information on selecting the right adhesive, take a look at our guide to understanding tile adhesives.
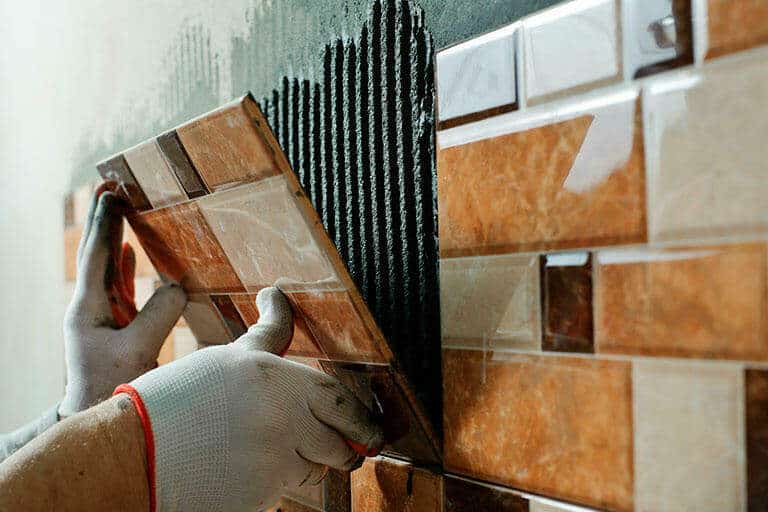
Incorrect Tile Placement
The final common misstep in DIY tiling is incorrect tile placement. This can result in uneven lines, imbalanced patterns, and an overall unprofessional finish.
To avoid this, always start tiling from the center of the room and work your way out towards the edges. This approach ensures a symmetrical pattern and a more balanced appearance. For more tips on creative tiling patterns, visit our article on transforming spaces with creative tiling patterns.
By being aware of these common DIY tiling mistakes, homeowners can better equip themselves to avoid potential pitfalls and achieve a professional-looking finish when undertaking their tiling projects.
Detailed Mistakes and Solutions
While DIY tiling can seem like a straightforward task, there are several mistakes that homeowners make that can lead to less than satisfactory results. Understanding these mistakes and the solutions to them can guarantee a more successful tiling experience.
Mistake: Forgetting to Seal Tiles
A common misstep in DIY tiling is forgetting to seal the tiles, especially when using porous tiles such as natural stone. Unsealed tiles can absorb water and stain easily, reducing the longevity and attractiveness of the tiled surface.
Solution: Proper Sealing Techniques
To prevent this issue, it’s crucial to seal the tiles properly. The sealing process involves applying a thin layer of sealant to the surface of the tile, either before grouting or after, depending on the type of tile and sealant being used. Sealing protects the tiles from water absorption and staining, preserving their appearance over time. For more information on this, our article on how to maintain your tiled surfaces: easy cleaning tips provides useful insights.
Mistake: Not Allowing Adhesive to Dry
Another frequent DIY tiling mistake is not allowing the adhesive to dry properly before grouting. This can lead to tiles shifting or becoming unsecured, which not only affects the look of the tiling but can also cause potential hazards.
Solution: Understanding Drying Times
To avoid this, it’s important to understand the drying times for the specific adhesive you’re using. This information is typically available on the product packaging. Adhesive drying times can vary based on factors such as humidity, temperature, and the type of tile and substrate being used. You can find more information on this in our article on understanding tile adhesives: a complete guide.
Mistake: Incorrect Grouting
Incorrect grouting is another common DIY tiling mistake. This can manifest as uneven grout lines, excess grout left on the tile surface, or grout that cracks and crumbles over time.
Solution: Grouting Best Practices
The solution to this lies in proper grouting techniques. This involves applying the grout with a rubber float at a 45-degree angle to the grout lines, removing excess grout from the tile surface before it dries, and allowing the grout to cure properly before sealing. Additionally, using a grout that is suitable for the type of tile and the size of the grout line is essential. For more detailed guidance on this, refer to our article on grouting techniques for perfect finishes every time.
By understanding these common DIY tiling mistakes and their solutions, homeowners can ensure a successful and satisfying tiling project. Remember, the key to great tiling lies in careful planning, using the right materials and equipment, and taking the time to carry out the process correctly.
Tips to Avoid DIY Tiling Mistakes
While tiling your own home can be a rewarding project, it’s important to take the necessary precautions to avoid common mistakes. Here are some tips to help you navigate your DIY tiling project successfully.
Tip: Choosing the Right Materials
The success of your tiling project heavily depends on the materials you choose. This involves picking the right tiles, adhesive, and grout for your specific project.
When selecting tiles, consider the area you’re tiling. For instance, non-slip tiles are a good choice for bathrooms, while easy-to-clean tiles are ideal for kitchens. You can read more insights on this in our guide on choosing the right tile for your kitchen.
The adhesive should be suitable for both your tiles and the surface you’re tiling. Not all adhesives are created equal, so it’s crucial to choose one that will hold your tiles securely in place. Learn more about this in our understanding tile adhesives guide.
Lastly, choose a grout color that complements your tiles and consider whether you want a sanded or unsanded grout based on the size of your grout lines. Read through our guide on grouting techniques for perfect finishes every time for more information on this.
Tip: Preparing Your Work Area
A well-prepared work area is key to avoiding DIY tiling mistakes. Start by ensuring the surface you’re tiling is clean, dry, and level. If you’re tiling a wall, check that it can support the weight of the tiles.
Next, plan your tile layout before you start. This will help you avoid awkward cuts and ensure a professional-looking finish. For more tips on planning your layout, check out our article on transforming spaces with creative tiling patterns.
Finally, gather all necessary tools and materials before starting. This includes a good quality tile cutter, a notched trowel, a tile spacer, a grout float, and safety gear such as gloves and goggles.
Tip: Following Instructions Carefully
One of the most important tips to avoid DIY tiling mistakes is to follow all instructions carefully. This applies to everything from mixing the adhesive to applying the grout.
For instance, when mixing the adhesive, ensure you follow the manufacturer’s instructions on the packaging. The adhesive should have a consistency similar to toothpaste. If it’s too runny, it won’t hold the tiles properly. If it’s too thick, it will be difficult to spread.
When applying the tiles, press them firmly into the adhesive and use tile spacers to ensure even gaps for the grout. Make sure to wipe off any excess adhesive immediately to prevent it from drying on the surface of the tiles.
Finally, allow the adhesive to dry fully before starting to grout. The drying time will depend on the type of adhesive you use, so be sure to check the manufacturer’s instructions.
By choosing the right materials, preparing your work area, and following instructions carefully, you can avoid common DIY tiling mistakes and achieve a professional-looking finish in your home.
Hiring a Professional Vs DIY Tiling
While DIY tiling can be a rewarding project for homeowners, there are instances when hiring a professional might be a more suitable option. This section delves into the circumstances where professional services could be beneficial, the advantages of hiring experts, and the cost and time implications of professional tiling.
When to Consider a Professional
Professional tiling services should be considered when the tiling project involves complex patterns, large areas, or specialized types of tile. A professional can navigate these challenges with ease, ensuring a high-quality finish.
Additionally, homeowners should think about hiring a professional if they lack the necessary tools or time to complete the project. Professional tilers come equipped with all the necessary tools and expertise to complete the job efficiently and effectively.
When tackling a DIY tiling project, homeowners should be aware of the common mistakes and know how to avoid them. If they are not confident in their ability to avoid these pitfalls, hiring a professional could save time, money, and frustration in the long run.
Advantages of Professional Tiling Services
Hiring a professional tiler offers several advantages. Firstly, professionals have the expertise and experience to handle any tiling project, no matter how complex it might be. They are knowledgeable about the latest tiling trends, techniques, and materials, ensuring that the end result is both stylish and durable.
Secondly, professional tilers can offer valuable advice on the best types of tile for a particular space, taking into account factors such as light, moisture, and traffic levels. They can also provide guidance on creative tiling patterns, color schemes, and finishes to enhance the aesthetic appeal of the space.
Lastly, professionals can complete the job quickly and efficiently, saving homeowners time and effort. They also ensure the job is done right the first time, reducing the risk of costly rework due to DIY mistakes.
Understanding the Cost and Time Implications
While hiring a professional tiler may seem costly upfront, it can save homeowners money in the long run. Professionals can avoid common DIY tiling mistakes, reducing the risk of costly rework or repair. They can also complete the job faster, saving homeowners time and disruption.
The cost of professional tiling services can vary depending on several factors, including the size and complexity of the project, the type of tiles used, and the location of the property. It’s important for homeowners to obtain several quotes and compare services before making a decision.
As for the timeframe, professional tiling projects can typically be completed in a matter of days, depending on the size and complexity of the project. Homeowners should discuss the timeline with their chosen professional to ensure they are comfortable with the schedule.
In conclusion, while DIY tiling can be a rewarding project, there are instances when hiring a professional may be more beneficial. By understanding the advantages and cost implications of professional tiling services, homeowners can make an informed decision about the best approach for their tiling project. For more expert tiling tips and tricks, visit our tiling page.