Why Choose Tony Tling
DIY tiling: don’t try it before reading these tips from the tradie!
As we spend more time in the house, Irish are selecting up their tools as well as diving right into Do It Yourself reno jobs of all sizes and shapes. Yet understanding where to start can be daunting for even the savviest of renovators, as well as tiles can be especially complicated if you’ve never tiled before.
As an improvement specialist, carpenter and also The Block graduates, Kyal Demmrich has spent his fair share of time diving into Do It Yourself restorations with his wife Kara. “We have completed more than 35 reno tasks currently, as well as over that time I’ve located that knowing what our end objective is, including the style we’re choosing, really does assist with the remainder falling right into location,” Kyal states. With the best details and the right tools, the majority of improvements are fairly simple, especially when you follow a few easy suggestions.
With tiling, once individuals have arrived on layout elements like choice of tile and laying pattern, the majority of the hard lawns have been run– though caution requires to be taken to stay clear of mistakes such as using unsuitable adhesives, tiling on surfaces that are moist, and also falling short to measure as well as cut precisely.
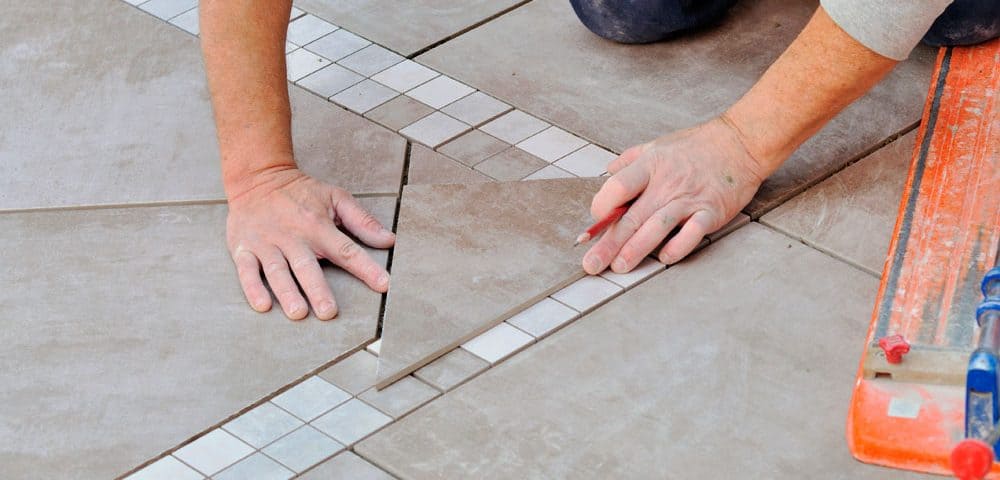
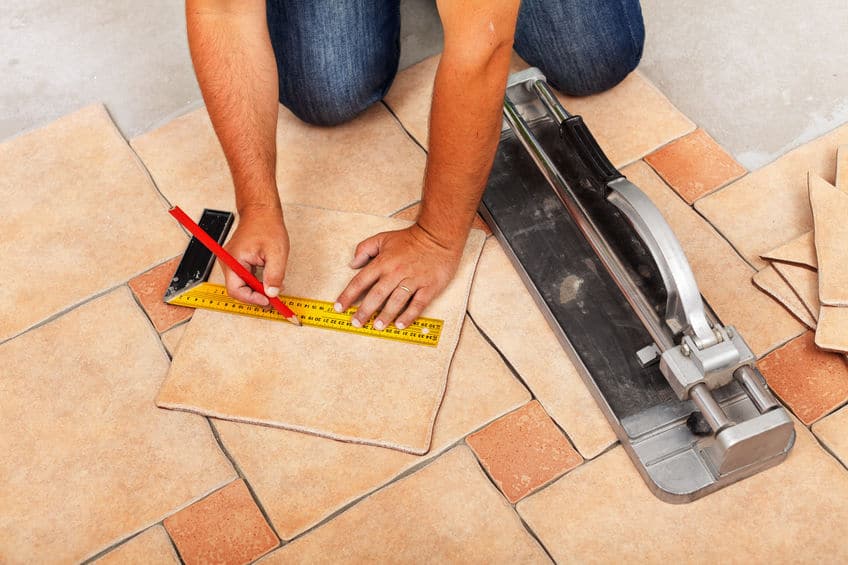
” There is an excellent claiming in the trade: Procedure two times, cut when. That’s my gold regulation for all things tiles and also DIY,” Kyal claims. “From computing the number of tiles you need, through to the cuts as well as arrangement of the tiles themselves, never underestimate the importance of a great old measuring tape as well as solid forward planning.”
Other tile ‘tricks of the tradie’ offered by Tony Tiling:
Dry surface areas: Before you begin, your surface ought to be dry, tidy, as well as smooth. If you are tiling in a damp location, it should be waterproofed appropriately prior to you commence tiling.
Clean tiles are a must: Tiles ought to be totally clean and completely dry. Any type of loosened powder on the backs of tiles should be gotten rid of to prevent polluting the adhesive. A fine bristle brush is great to aid with this.
Not all adhesives are created equivalent: Do not skimp, and also see to it you select the appropriate adhesive for the surface area and type of tile. There are many brands of adhesive available, as well as they are all made for certain kinds of tiles as well as tile surface areas.
Dimension does matter for the amateur DIYer: Tiling with big tiles is tough, even for seasoned pros. Big layout tiles are heavy and also are pricey to change if mistakes are made, so DIY newbies ought to aim for tiles no bigger than 300 x 600mm.
Start with the grate: The secret with tile design is starting from the flooring grate (either inside or outside the shower) as well as working your method outwards. Create a strategy of your floor/wall/splashback and map out where your tiles will go. Now, you should also examine that you have the correct fall to the grate. This ensures that your water will certainly recede properly.
Dry laying is every little thing: Dry laying tiles first ensures you have the correct number of tiles in addition to developing a vision of just how they will look. Dry laying is additionally the excellent time to confirm whether you more than happy with your tile option, or if you need to make eleventh hour adjustments.
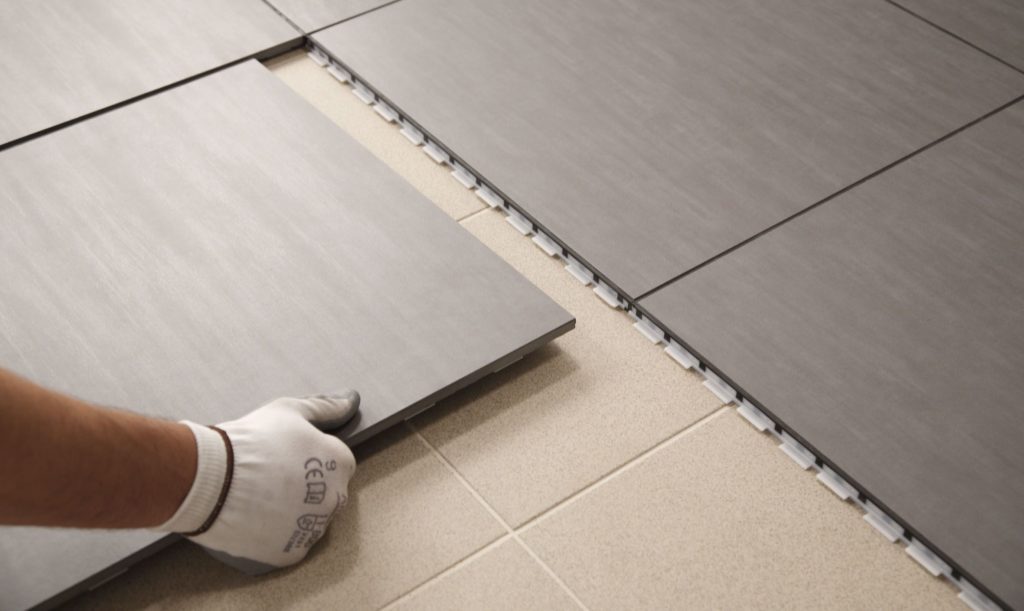
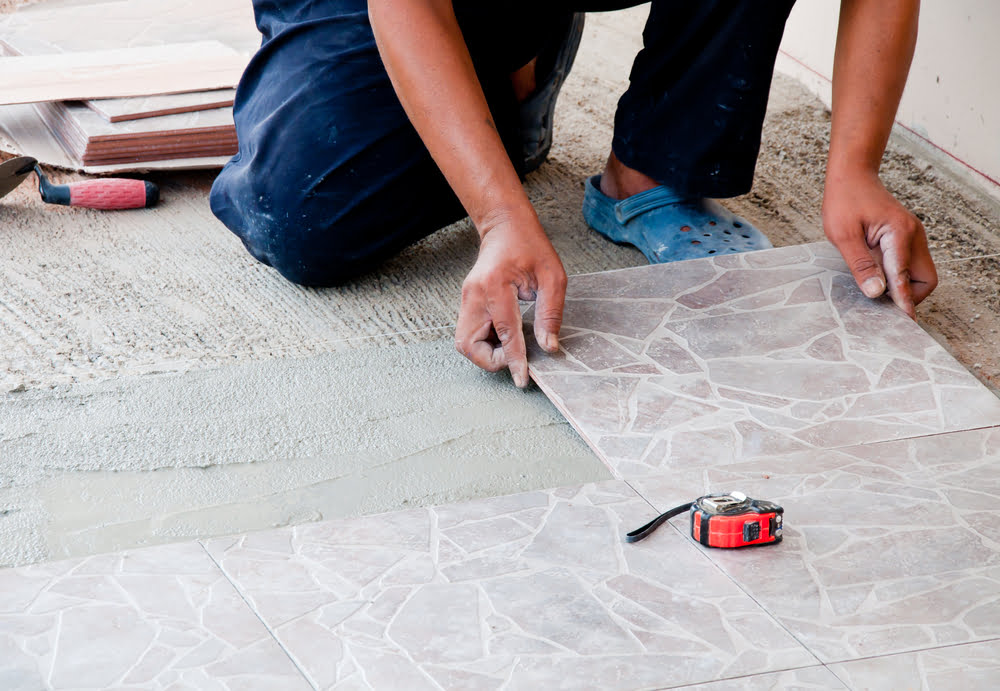
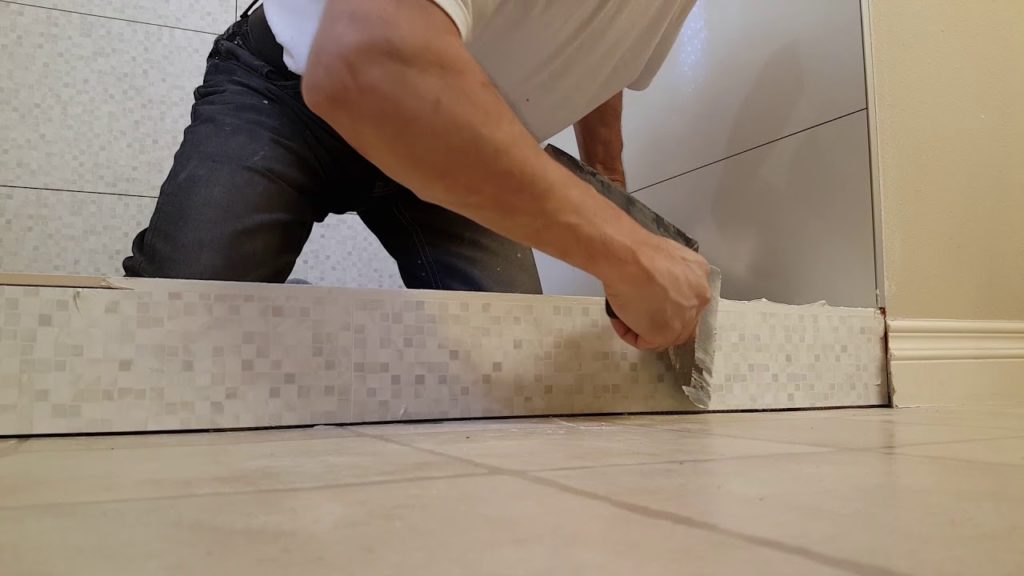
Lay tiles carefully: Tiles that are positioned unevenly create an unequal joint (or ‘lip’) which might be a trip hazard– there are levelling items available to help with this. Make certain you tile the flooring before your wall surface– wall tiles should slot neatly over your floor tiles. Where silicone is used, leave a 2-3mm gap where floorings as well as wall surfaces satisfy.
Peel as well as area modern technologies: A fantastic item to make your tiling even less complicated is BT-Instalay CTU by Gripset. This floor covering system is a game-changer as well as can prepare a surface area for tiling in just 4 easy and fast steps. BT-Instalay CTU is additionally 10 times lighter than concrete sheets, making it a perfect floor covering system for DIYers. It is likewise a waterproofing membrane if you are using it in wet locations.
Grout is a gift: Comply with the maker’s guidelines exactly. Wait a minimum of 24 hrs after laying before grouting and protect the tiles from any type of water or climate condition by covering them with old clean sheets. Do not grout where walls fulfill floors or where two wall surfaces fulfill. Rather, use silicone when the surrounding grouted location is completely dry. Epoxy grout is a superb alternative due to its resilience as well as tarnish resistance. It is a wind to tidy and also best for outside or wet locations, making it an interesting choice to cement grout.
Ceramic Tile Flooring in 9 Steps
Right here are simple setup suggestions on bathroom flooring and also flooring tile that’ll maintain what’s below your feet lengthy and also solid long lasting.
SKIL
Moderate
Laying tile can be hard on the knees and back
COST
€4 to €8 average price per square foot
ESTIMATED TIME
6 to 10 hours to tile an 8×10-foot room
Jason has actually been laying tile for three decades– most of them for This Tony Tiling— and also nevertheless this moment, he’s still enamored with the material. “I like tile,” he claims. “It’s gorgeous and it doesn’t call for much maintenance.”
On a floor, these slim, fragile slices of ceramic need some unique care and prep work. Or else, they will not survive the parade of feet through an access or the unexpected spills in a bathroom or kitchen, where floors go from bone completely dry to sopping damp faster than you can state “puddle.”.
” Anytime I come close to a new task, I make sure the location about to be tiled is tight sufficient so it won’t bend when somebody strolls on it as well as that it can stand up to wet-and-dry cycles,” states Ferrante. Mounted the best method, utilizing some basic tools and also methods, a tile flooring need to last for life, come heck or high water.
Steps on How to Lay Tile
1. Tiling a Floor Overview
- Pursue a format that makes the most of the number of whole tiles and the dimension of any kind of cut tiles.
- Place them where vanities will certainly cover them later on or out of the primary view lines from the doorway when awkwardly sized tiles can’t be stayed clear of.
- You should not step on any tiles up until the thinset has cured for at least 24 hrs.
- Save every one of the cuts needing a wetsaw for last. Rent the wetsaw for one day.
2. Dry layout
- Discover the axis of each wall and also snap chalk lines on the floor. The line crossing at the room’s center are the starting factor of the tile.
- Lay a row of tiles along a straightedge extra than midway throughout the space. For consistent joints, make use of tile spacers. This row figures out the size of cut tiles along the wall surfaces.
- At the room’s center, position a tile where the chalk lines go across with its sides touching the lines. Step from one wall (refer to it as A) to the nearest tile side. Currently, most likely to the tile row as well as, starting at a joint, procedure along the row and also mark the distance you simply gauged. The mark reveals the width of the tile at the wall. If that measurement is less than 2 inches, go back to the facility tile as well as relocate far from wall A to produce a bigger cut tile.
3. Dry design, Component II.
- From the center tile, action to the contrary wall surface (call it B; mark this range along the tile row. Readjust the facility tile along the A-to-B line till measurements at wall surfaces An as well as B coincide.
- After readjusting the A-to-B line, note the facility tile where it touches the chalk line in between the other wall surfaces (call them C as well as D). Line up these marks with the C-to-D chalk line. Repeat the measuring and changing procedure for walls C and also D.
- Lay a straightedge alongside the C-to-D line as well as against one side of the facility tile. Mark the straightedge where it fulfills an edge of the tile. This mark is your starting factor for laying tile.
- Trim door housings with a flush-cut saw so tile can slide underneath. Cut with saw held flat against a tile in addition to a piece of cardboard (to represent the density of the thinset).
4. Spread thinset mortar
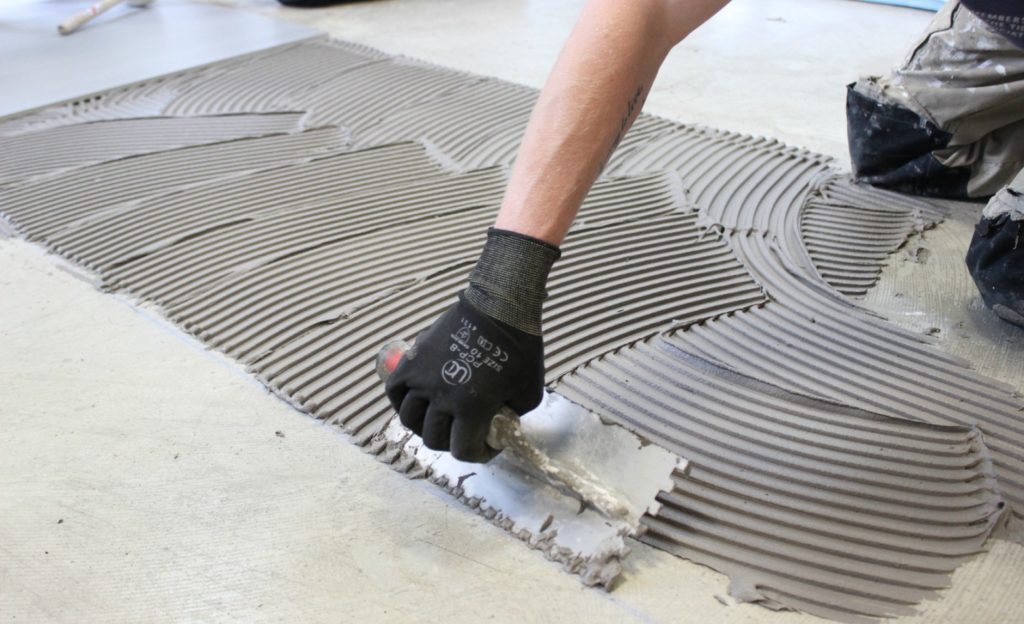
- Chuck a mixer into a drill as well as mix the powdered thinset with latex additive– not water– up until it’s the consistency of mayo. Allow it slake (remainder) for about 10 minutes. Mix just as much thinset as you can use in 2 hrs.
- With the level edge of a trowel, spread out a thin layer of thinset (scrape layer) over a 2-by-3-foot area next to the straightedge.
- Before the scratch layer dries, apply more thinset making use of the notched edge of the trowel. Hold the trowel at a 45-degree angle to the flooring as well as spread the thinset evenly in wide rounded strokes, after that completed with a straight pass, which makes certain the most effective attachment. Brushing the thinset into furrows allows air to get away as the tile is established.
Suggestion: When spreading thinset, press down hard so that the trowel makes a scraping audio; the trowel’s notch size ought to equate to the tile density.
5. Establish the tile
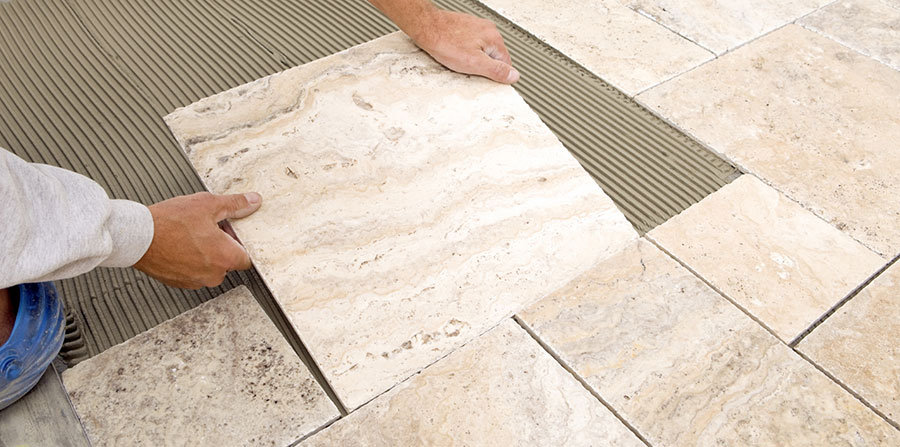
- Gently lay a tile on thinset beside the straightedge. With fingertips extensive, press down with a slight spin of the wrist.
- Utilize this same technique to set each tile, making one row along the straightedge. Making use of tile spacers ensures also joints.
- Move the straightedge off the beaten track and lay the next row along with the initial, utilizing the side of the tile as your overview. Continue spreading out thinset as well as setting tiles in 2-by-3-foot areas, functioning from the facility of the area out toward the walls. Every few rows, hold a mounting square or A-square together with the edge of the tiles to check that they are square per various other.
Tip: Constant finger pressure (as well as constant practice) helps prevent lippage– where a tile’s side is greater or less than its next-door neighbors.
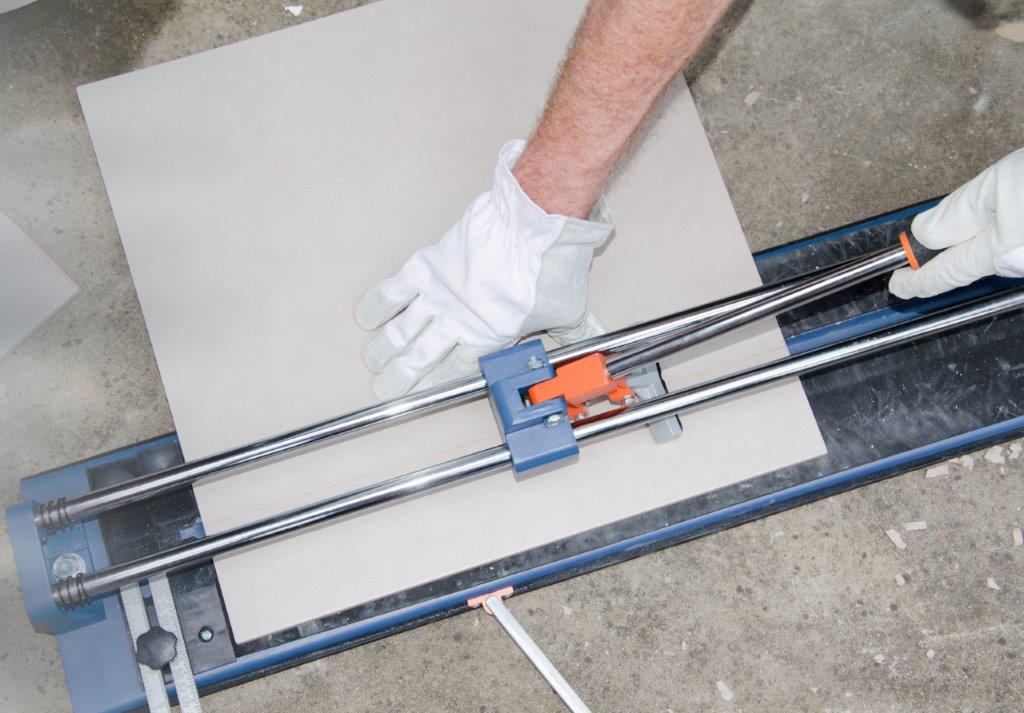
6. Final cuts
- Make straight cuts as needed with a snap cutter. When waste is greater than an inch wide, score tile with one company stroke, after that break by pushing down deal with. Smooth cut edge with massaging stone.
- For straight cuts with waste less than an inch wide, rating tile on snap cutter, then snap pieces off with nibblers or use a wet saw.
- To fit a tile around an outside corner, hold one edge versus the wall surface as well as mark the tile where it touches the corner. Pencil a line completely throughout the tile. Without transforming the tile, move it to the various other side of the edge and once again mark where tile and also corner fulfill. Mark an X on the component to be reduced away.
7. Notch the tile
- On a wet saw, reduced the tile from the mark to the line, taking treatment not to go past the line. Turn the tile and also cut along the line next to the X, up to however not past the first cut. At end of cut, raise up the side farthest from you to help release the waste.
- For bent or scribed cuts, make parallel pieces with the damp saw into the waste section, approximately but not past the line noting the cut. After that damage away the remaining “fingers” with nibblers.
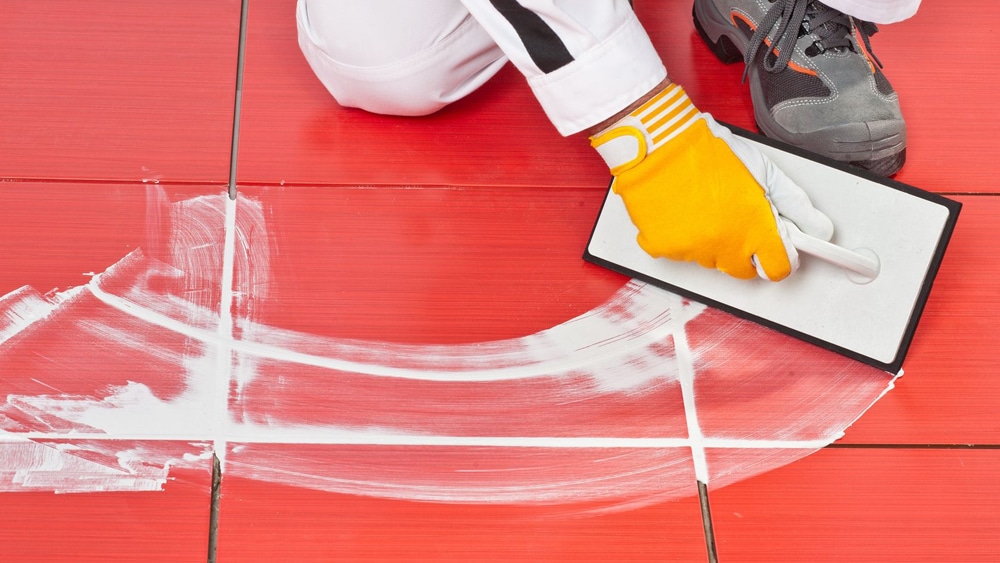
8. Fill the tile joints with grout
- After tile collections overnight, utilize a margin trowel to scrape off any kind of thinset from the tile surface area or in the joints.
- Mix up a set of cement to a looser-than-mayonnaise consistency. Include water a little each time by pressing it from a sponge.
- Scoop a trowelful of grout onto the floor as well as spread it with a rubber float held at a 45-degree angle to the flooring. Push grout into the joints by very first relocating the float according to the joints, after that angled to them. Work from the edges of the room towards the facility.
9. Tidying up the cement
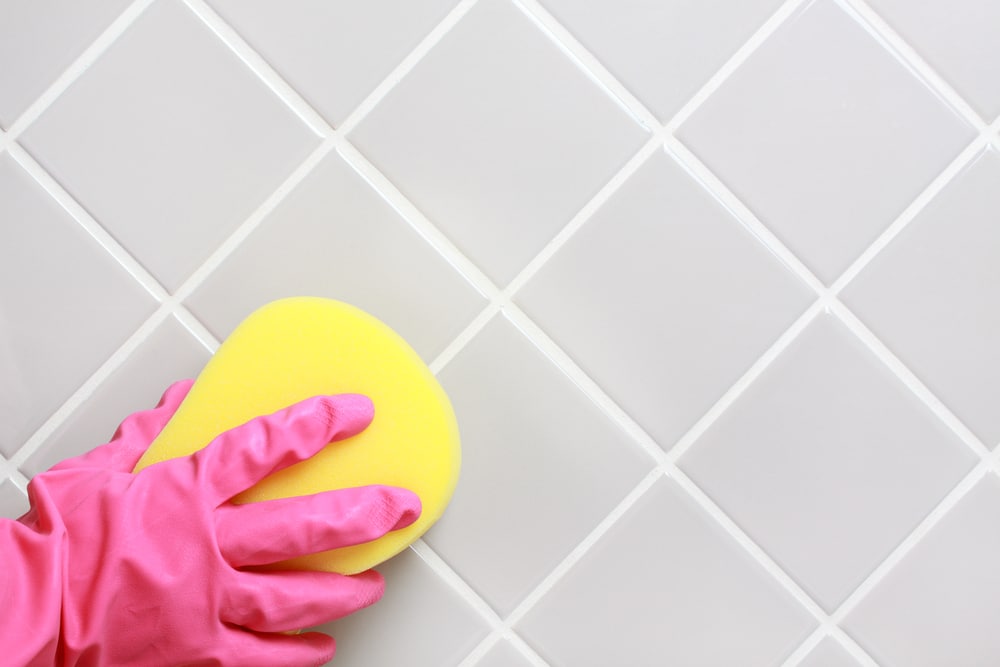
- Allow the grout to establish up for 20 or 30 minutes. It ought to be solid to the touch before you begin washing the tile’s surface. Wipe away grout haze with a wet, well-squeezed sponge washed usually in a pail of tidy water.
- Once more, wait on grout to haze over, after that clean with clean sponge. Repeat up until the tile is clean.
Pointer: Do not be too hostile when cleaning up cement haze, or you might pull cement out of the joints.